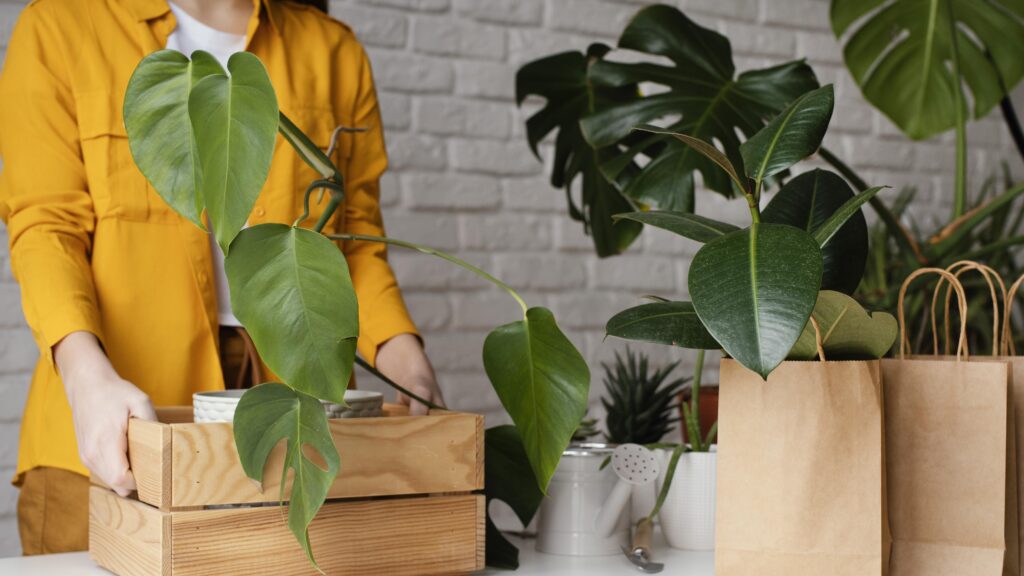
So, you’re planning a big move and wondering how to get your green friends to the new place. You might be surprised to learn that professional movers can’t help with moving plants long distance. It’s not that we don’t love your fiddle-leaf fig! Strict agricultural laws and the simple fact that plants are incredibly fragile mean they can’t ride in the moving truck. But don’t worry. While we can’t transport them for you, we can definitely show you how to do it safely yourself.
Plant lovers facing long-distance moves often feel frustrated when they discover their beloved houseplants, garden specimens, and green companions can’t come along in the moving truck.
Understanding why movers refuse plants and exploring alternatives helps you plan better and potentially save some of your green friends during your relocation.
According to the USDA Animal and Plant Health Inspection Service, plant transportation across state lines is heavily regulated to prevent the spread of pests and diseases.
How to Move Plants: A Step-by-Step Guide
Deciding Which Plants to Move
Evaluate Plant Health and Climate
Moving is stressful for plants, so it’s best to take only the ones with a strong chance of surviving the trip. Before you commit to moving a plant, give it a thorough check-up. Look for any signs of pests, diseases, or weak stems. It’s a good idea to treat any issues you find well before moving day, but you may have to decide if a particularly sick plant should be left behind. You also need to consider the climate of your new home. A tropical hibiscus that loves your humid Florida patio might not fare well in the dry heat of Arizona. Researching the USDA Plant Hardiness Zone of your new location will help you determine which of your outdoor plants can make the transition successfully.
Reduce Your Collection
As much as you love your green family, it’s often not practical to move every single one, especially if you have a large collection. Moving is a great opportunity to streamline. Consider selling or giving away your largest plants or any that are common and easy to replace. Your giant fiddle-leaf fig might be a showstopper, but it will also be a major challenge to transport safely in a car. You can sell plants through local online marketplaces or plant-swapping groups, or simply gift them to friends and neighbors who have admired them. This will lighten your load and ensure your plants go to a good home, making your move a little less complicated.
Legal and Regulatory Restrictions
The primary reason professional movers won’t handle plants is the complex web of state and federal regulations governing plant transportation across state lines.
Each state has different agricultural regulations designed to prevent the introduction of invasive species, pests, and plant diseases that could devastate local ecosystems and agriculture.
Preparing Plants for the Move
A successful plant move begins weeks before the actual moving day. Just like people, plants get stressed by sudden changes, so giving them time to prepare can make a huge difference in their ability to survive the journey. A little proactive care ensures they are healthy and resilient enough to handle the transition to a new environment. This preparation involves more than just watering; it’s about getting them into optimal shape for travel. By trimming, checking for pests, and adjusting their watering schedule, you set your plants up for success. While our teams at Starving Students can manage the packing of your household goods, your plants will need your personal touch to get them ready for the trip ahead.
Prune and Repot a Few Weeks Out
About two to three weeks before your move, give your plants a good check-up. Start by pruning any dead or yellowing leaves and trimming back overgrown branches. This not only makes the plant healthier but also more compact and easier to pack. It’s also the perfect time to check for any pests and treat them accordingly, so you don’t bring any unwanted guests to your new home. If your plants are in heavy ceramic or terracotta pots, consider repotting them into lightweight plastic containers. This will make them significantly easier to lift and transport. Moving is already a workout; no need to make it harder with unnecessarily heavy pots.
Create a Pre-Move Watering Schedule
Watering your plants correctly before a move is a delicate balance. You don’t want them to be completely dry, but you also don’t want them to be waterlogged, which can lead to root rot and messy leaks during transit. The best approach is to water them thoroughly about two to three days before you plan to move. This gives the soil enough time to absorb the moisture and for the excess to drain away, leaving the soil perfectly damp but not soaking wet. For succulents and other plants that prefer dry conditions, you can water them even earlier, about a week before the move, to ensure their soil is dry on moving day.
How to Pack Plants for Moving
Once your plants are prepped, the next step is to pack them securely for the journey. Proper packing is essential to protect them from broken stems, crushed leaves, and spilled soil. The goal is to create a stable environment within a box that keeps the plant upright and safe from jostling. Each plant may require slightly different handling depending on its size and shape, but the basic principles remain the same. Taking the time to pack them correctly will significantly increase their chances of arriving at your new home in great condition. This is one of the few items you’ll need to pack yourself, but our expert packing tips can guide you through the rest of your belongings.
Secure the Soil and Pot
The first step in packing a plant is to make sure the pot and its soil are secure. To prevent soil from spilling out during transit, you can cut a piece of cardboard to fit snugly over the soil around the base of the plant and tape it to the pot. Alternatively, you can place a plastic bag over the pot and tie it loosely around the plant’s stem. Once the soil is covered, place the pot inside a sturdy moving box. If the pot is much smaller than the box, stuff packing paper or bubble wrap around its base to keep it from sliding around and tipping over during the move.
Protect the Leaves and Stems
Delicate leaves and tall stems are the most vulnerable parts of a plant during a move. To protect them, you can create a loose sleeve around the plant using materials like newspaper, brown packing paper, or even an old bedsheet. Gently wrap the material around the plant, starting from the base and working your way up, and secure it with tape. This will help prevent branches from snagging or breaking. For taller plants, you might need to place a stake in the pot for extra support before wrapping. The key is to be gentle and give the plant enough room to breathe within its wrapping.
Use the Right Box and Packing Materials
Choosing the right box is crucial. It should be tall enough to accommodate the plant without bending its leaves and sturdy enough to hold the weight of the pot. You can often find boxes in various sizes at local grocery or liquor stores. Once the plant is inside, fill any empty space with crumpled packing paper or other soft materials to cushion it. This prevents the plant from shifting inside the box. Be sure not to pack it too tightly, as plants need air circulation to survive. Finally, poke a few air holes in the sides of the box to ensure proper ventilation.
Label Everything Clearly
Clear labeling is your best friend on moving day, especially when it comes to fragile items like plants. Use a thick marker to write “LIVE PLANT” and “FRAGILE” in large letters on at least two sides of the box. It’s also essential to draw arrows pointing up to indicate which side should face up. This simple step alerts anyone handling the box to be extra careful and ensures it stays upright. This is one of the most important moving tips we can offer, as it prevents a lot of unnecessary damage and heartbreak when you finally unpack at your new home.
Consider the Bare-Root Method
For long-distance moves where space and weight are major concerns, the bare-root method can be a great option. This involves carefully removing the plant from its pot and gently shaking off as much soil as possible from the roots. Once the roots are exposed, wrap them in damp paper towels and then place them inside a plastic bag to retain moisture. The rest of the plant can then be wrapped in paper as usual. This method significantly reduces the weight and size of each plant, making it much easier to fit a large collection into your car for the journey.
Transporting Your Plants
Since professional movers can’t take your plants, you’ll need to figure out the best way to transport them yourself. The method you choose will depend on the distance of your move, the number of plants you have, and your budget. The most common and recommended method is to move them in your own vehicle, where you can control the environment. However, for cross-country moves or if you have a very large collection, you might need to explore other options like flying with them or shipping them. Each method has its own set of rules and best practices to ensure your plants arrive safely.
Moving Plants in Your Car
Transporting plants in your car is the safest and most reliable option. It allows you to control the temperature and ensure they get enough light and air. Place the packed boxes securely on the floor or seats of your car, making sure they won’t tip over during turns or sudden stops. Never put plants in the trunk, as the temperature fluctuations and lack of airflow can be fatal. The climate-controlled cabin of your car provides a stable environment that minimizes stress on your plants. Keep the temperature comfortable, generally between 65–75°F, to mimic their ideal indoor conditions as much as possible.
In-Transit Care for Overnight Stays
If your move involves an overnight stay at a hotel, don’t forget about your green passengers. Leaving them in the car overnight can expose them to extreme temperatures, both hot and cold, which can be deadly. Make the extra effort to bring your plants into your hotel room for the night. Once inside, you can open the tops of the boxes to give them some fresh air and light. This small step can make a huge difference in their well-being, especially during a multi-day journey. It ensures they remain in a stable, climate-controlled environment throughout the entire trip.
Tips for Moving Plants in Cold Weather
Moving during the winter adds another layer of challenge for your plants. Cold shock can happen quickly and cause serious damage. To protect them, make sure your car is warmed up before you load them inside. When moving the plants from your home to the car, you can wrap the boxes in blankets or towels for an extra layer of insulation. Work quickly to minimize their exposure to the cold air. If possible, try to move on a milder day. Even a few degrees can make a difference for sensitive tropical plants that are not accustomed to cold temperatures.
Flying with Plants
If you’re flying to your new home, you might be able to take a small plant or two with you. According to the Transportation Security Administration (TSA), you can bring plants in both your carry-on and checked baggage. However, it’s always best to transport them in your carry-on so you can keep an eye on them. Make sure the plant fits the airline’s size restrictions for carry-on luggage. You’ll also need to be prepared for the security screening process. While it’s allowed, it’s a good idea to check with your specific airline for any additional rules they may have about traveling with plants.
Shipping Plants
Shipping is another viable option, especially for long-distance moves. Services like USPS, FedEx, and UPS all have guidelines for shipping live plants. You’ll need to pack them very securely, following the bare-root method or ensuring the pot is well-cushioned and the soil is contained. Label the box clearly with “LIVE PLANT” and “FRAGILE.” It’s best to use an expedited shipping service, like 2-day or overnight, to minimize the time your plants spend in transit. Before shipping, check the agricultural regulations for the destination state to ensure the specific plants you’re sending are allowed to enter.
Caring for Plants After You Arrive
Getting your plants to your new home is only half the battle. The final, and equally important, step is helping them acclimate to their new environment. The stress of a move can take a toll on them, and they’ll need some extra care and attention as they recover. You might notice some drooping or yellowing leaves, which is a normal reaction to the stress of being moved. The key is to be patient and provide a stable, nurturing environment. By unpacking them immediately and giving them time to adjust, you can help them bounce back and thrive in their new space.
Unpack Immediately
As soon as you arrive at your new home, make unpacking your plants a top priority. They’ve been in a dark box for a while and will be desperate for light and fresh air. Carefully remove them from their boxes and take off any protective wrapping. Place them in a location that receives indirect sunlight to start, as placing them in direct, harsh sun right away can scorch their leaves. Check the soil moisture and give them a drink of water if they feel dry. This immediate care helps them start the recovery process right away.
Help Them Adjust Slowly
Your plants will need time to get used to the new light, temperature, and humidity levels in your home. This adjustment period is often called “transplant shock.” To help them through it, try to replicate their old environment as much as possible initially. Avoid making any drastic changes, like repotting them into new containers or giving them fertilizer, for at least a few weeks. Let them settle in first. It’s normal for them to drop a few leaves as they acclimate. Just give them consistent care, and with a little patience, they should return to their happy, healthy selves.
Frequently Asked Questions
Why can’t professional movers just put my plants on the truck? It really comes down to two things: strict agricultural laws and the well-being of your plants. Each state has rules to prevent the spread of pests and diseases, and moving companies have to follow them. Plus, a moving truck isn’t a great place for a plant—it can get too hot or cold, and there’s no light or fresh air. We want your plants to survive the trip, and the back of a truck just isn’t a safe environment for them.
Is it better to repot my plants before or after I move? If your plants are in heavy ceramic or terracotta pots, I recommend repotting them into lightweight plastic containers about two or three weeks before you move. This makes them much easier and safer to carry. Once you’ve arrived and your plants have had a few weeks to adjust to their new home, you can move them back into their decorative pots. Just try to avoid repotting them right before or right after the move, as that adds extra stress.
What’s the safest way to transport my plants on a long-distance move? The best method by far is to move them in your own car. This way, you can control the temperature and make sure they aren’t getting tossed around. Keep them in the main cabin with you, never in the trunk where temperatures can swing wildly. If you have to stay in a hotel overnight, be sure to bring your plants inside with you to keep them safe from extreme heat or cold.
My plant looks sad and droopy after the move. Did I do something wrong? Don’t panic! It’s completely normal for plants to look a little stressed after a move. They’ve just been through a major change in their environment. This is often called transplant shock, and it can cause some drooping or yellowing leaves. Just give your plant some time. Unpack it right away, place it in a spot with indirect light, and give it a few weeks to acclimate before you consider repotting or fertilizing. A little patience is usually all it needs to bounce back.
Can I just ship my plants to my new home instead of driving with them? Yes, shipping is definitely an option, especially if you can’t take them in your car. You’ll need to pack them very carefully, often using the bare-root method where you wrap the roots in damp paper instead of sending the whole pot. Always use an expedited service, like 2-day shipping, to reduce travel time. Just be sure to label the box clearly with “LIVE PLANT” and check the agricultural rules of your destination state beforehand.
Key Takeaways
- Prep is Key for Plant Survival: A few weeks before your move, prune your plants, check for pests, and switch to lightweight pots. A final watering two to three days before the trip ensures they travel with damp, not soggy, soil.
- Your Car is the Safest Ride: Movers can’t transport plants across state lines, so they’ll need to ride with you. Pack them securely in well-labeled boxes and keep them in your car’s main cabin to protect them from temperature extremes in the trunk.
- Ease Them into Their New Home: Once you arrive, make unpacking your plants your first task. Let them adjust slowly to the new environment by providing indirect light and consistent care, but wait a few weeks before making big changes like repotting.
Related Articles
- The Ultimate Guide to Moving Plants Long Distance
- Moving Plants Long Distance: Why Movers Say No (And What to Do Instead)
Starving Movers