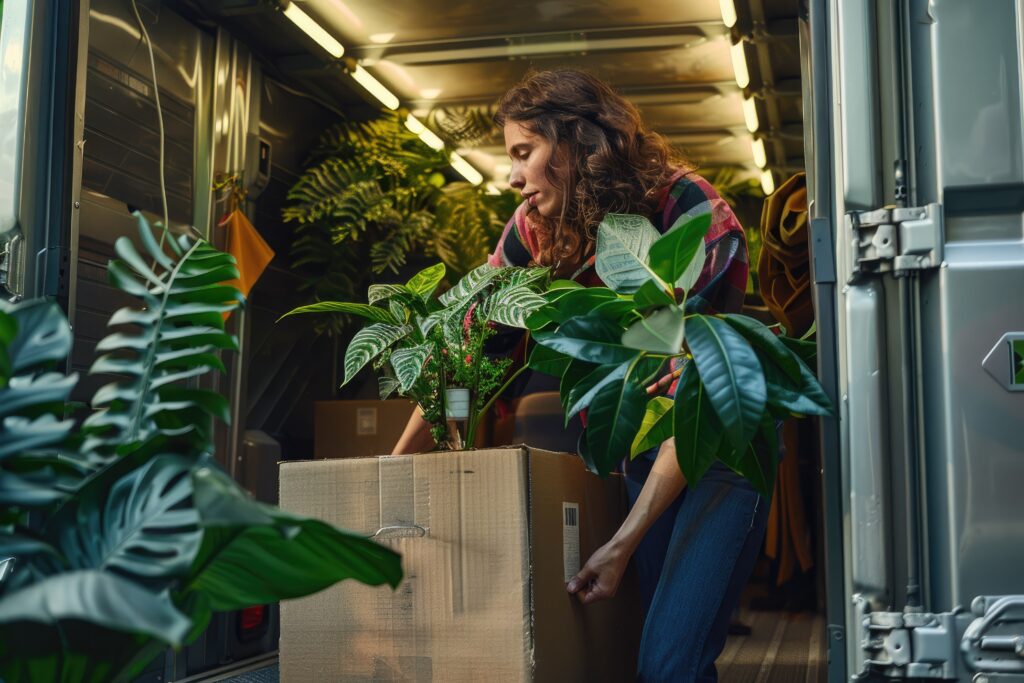
You’ve carefully nurtured your houseplants for years, watching them grow from small cuttings into lush, green companions that make your house a home. Now, as you plan your relocation, you’ve hit a surprising roadblock: the professional movers you hired won’t transport them. It’s a shock to learn your beloved plants can’t come on the truck. This isn’t an arbitrary rule; it’s based on complex regulations and liability issues. But don’t worry, it doesn’t mean you have to leave them behind. This guide explains exactly why movers say no and gives you a step-by-step plan for moving plants long distance yourself.
Why Movers Say “No” to Moving Plants
The refusal to transport plants isn’t arbitrary – moving companies have legitimate reasons rooted in regulations, liability concerns, and practical limitations. Understanding these reasons helps explain why you’ll need alternative solutions for your green friends.
Federal and State Agricultural Regulations: The United States Department of Agriculture (USDA) and various state agricultural departments have strict regulations about transporting plants across state lines. These laws exist to prevent the spread of invasive species, plant diseases, and harmful pests that could devastate local ecosystems and agricultural industries. Many states require special permits or inspections for certain plants, making it impractical for moving companies to handle these requirements for every customer.
Liability and Insurance Issues: Plants are living organisms that can die during transport due to temperature changes, lack of light, dehydration, or stress. Moving companies cannot guarantee that plants will survive a long-distance journey, and their insurance policies typically don’t cover living plants. The potential for customer disputes over dead or damaged plants creates significant liability risks that most companies prefer to avoid entirely.
Environmental Control Challenges: Moving trucks aren’t designed to maintain the specific environmental conditions plants need. Temperature fluctuations, lack of light, poor ventilation, and rough handling during transport create hostile conditions for plant survival. Professional movers recognize that their vehicles and storage methods aren’t suitable for living organisms.
The Rules of Moving Plants Across State Lines
Before planning your plant-moving strategy, research the agricultural regulations in your destination state. Some states have particularly strict restrictions on certain types of plants. California, for example, has extensive regulations about bringing plants into the state, especially those that might harbor pests like the Asian citrus psyllid or sudden oak death pathogen.
Hawaii has some of the most restrictive plant import laws in the country, requiring permits and inspections for most plants. Florida, Texas, and Arizona also have specific restrictions on certain plant species. Contact your destination state’s Department of Agriculture to understand what’s allowed and what documentation you might need.
Even if plants are allowed, some states require inspection certificates, quarantine periods, or treatment for potential pests. These requirements make it clear why professional movers avoid the complexity of plant transport entirely.
Pre-Move Plant Preparation
Since professional movers can’t transport your plants, you’ll need to become their personal moving crew. Proper preparation is the single most important factor in ensuring they survive the journey. This isn’t a task you can save for the last minute; your plants need time to acclimate to changes before they hit the road. Think of it as getting them ready for a marathon, not a sprint. Starting a few weeks before your move date will significantly reduce their stress and increase their chances of thriving in your new home. While our teams at Starving Students are busy loading your furniture and boxes, you can focus on giving your green friends the special attention they need. A solid plan will make all the difference.
Your preparation should cover a few key areas: creating a schedule, physically getting the plants ready for travel, and ensuring they’re a good fit for your new environment. This involves more than just putting them in a box. You’ll need to think about their pots, soil, and overall health. A little bit of planning goes a long way and can be easily integrated into your overall moving checklist. By tackling these steps methodically, you can turn a potentially stressful task into a manageable part of your relocation process, ensuring your leafy companions arrive safe, sound, and ready to put down new roots.
Create a Plant Moving Timeline
Moving is stressful for everyone, including your plants. They are living things that are sensitive to changes in light, temperature, and humidity. To minimize shock, it’s best to prepare them gradually over several weeks. About three to four weeks before your move, start by pruning any dead leaves or excess growth. This helps the plant conserve energy for the trip ahead. A week later, you should check for any pests and treat them accordingly, as you don’t want to bring any unwanted guests to your new home. This timeline gives your plants a chance to recover from each step before facing the stress of the actual move.
Repotting and Fertilizing
About two weeks before moving day is the perfect time to address your plants’ containers. If they are in heavy ceramic or clay pots, consider moving them into lightweight plastic pots of the same size. This not only makes them much easier and safer to lift and transport but also gives them time to adjust to their new, temporary home. When you repot, use fresh soil but hold off on the fertilizer. Fertilizing encourages new, delicate growth that is more susceptible to damage during transit. Your goal is to maintain the plant’s current health and stability, not to spur a growth spurt right before a long journey.
Check Your New Climate with the USDA Map
Before you go through the effort of moving a beloved plant, make sure it can actually survive in your new location. Different regions have vastly different climates, and a plant that thrives on your sunny California patio might not stand a chance against a New England winter. A fantastic tool for this is the USDA Plant Hardiness Zone Map, which helps you understand the growing conditions of your new area. Simply enter your new zip code to see your zone. If you discover that a cherished plant won’t be able to adapt, it’s better to find it a new home with a friend or neighbor. This proactive step can save you from the future heartache of watching it struggle to survive.
Your Guide to Moving Plants Yourself
Since professional movers won’t help, moving plants long distance becomes a personal responsibility. The most reliable method is transporting them yourself in your personal vehicle, where you can control the environment and monitor their condition throughout the journey.
Vehicle Preparation: Your car provides the best environment for plant transport. The passenger compartment maintains more stable temperatures than a truck bed or trailer, and you can adjust climate controls as needed. Plan to dedicate significant space to your plants – they shouldn’t be crammed together or placed where they might tip over during normal driving.
Timing Your Move: Schedule your plant transport for mild weather when possible. Extreme summer heat or winter cold makes the journey more stressful for plants. Spring and fall often provide the most plant-friendly moving conditions. If you must move during extreme weather, plan for shorter driving days and overnight stops where plants can recover.
Pre-Move Plant Preparation: Start preparing plants for the move several weeks in advance. Gradually reduce watering to prevent soggy soil during transport. Prune overgrown plants to make them more manageable and reduce stress. Check for pests and treat any infestations before moving – you don’t want to introduce problems to your new location.
Transporting by Car
If you’re driving to your new home, you’re in luck—this is the safest way to transport your plants. You have complete control over the temperature, light, and handling, which significantly reduces the stress on your green friends. The key is to pack them securely so they don’t tip, slide, or get crushed by other items during the trip. While our professional teams at Starving Students Movers are carefully handling your furniture and boxes as part of our moving services, you can dedicate a specific area of your car to create a safe haven for your plants. This ensures everything, from your couch to your cactus, arrives at your new home ready to settle in.
Maintaining the Ideal Temperature
Your car’s passenger compartment is the perfect spot for your plants. Unlike a trunk or a moving trailer, it offers stable temperatures that you can manage with your climate control system. Avoid the trunk at all costs, as it can get dangerously hot or cold and lacks air circulation. Give your plants plenty of room; don’t cram them together or wedge them between heavy boxes. For extra security, place smaller pots in a sturdy, open-top box and use newspaper or towels to fill the gaps. For larger plants, you can even use a seatbelt to hold the pot steady during the drive.
Overnight Care on Long Trips
A multi-day drive requires a bit of extra planning for your plants. Never leave them in the car overnight. A parked car can quickly become an oven or a freezer, depending on the outside weather, which can be fatal for your plants. When you stop at a hotel for the night, make your plants your first priority and bring them inside with you. If they’ve been boxed up, open the tops to let them breathe. This little bit of care is essential for successful long-distance moves with plants, ensuring they can rest and recover for the next leg of your journey.
Flying with Your Plants
If you’re flying to your new home, you might be able to take a few small, special plants with you. This option requires careful planning, as you’ll need to comply with both TSA and individual airline regulations. First, confirm that your airline allows plants in carry-on luggage. To pack them, choose a plastic container that meets carry-on size limits. Gently wrap each plant’s pot in newspaper and tape it to secure the soil and protect the leaves. Place the wrapped plants inside the container and fill any empty space with soft items like clothes or bubble wrap to prevent them from shifting. Since airplane cabins have very dry air, it’s a good idea to bring a small, empty spray bottle to fill with water after security so you can mist your plants during the flight.
How to Pack Your Plants for a Safe Move
Proper packing makes the difference between plants that survive the journey and those that don’t. Each plant requires individual attention based on its size, type, and fragility.
Securing Pots: Place pots in boxes or crates that prevent tipping. Newspaper or towels can fill gaps and provide cushioning. For very tall plants, consider removing them from heavy ceramic pots and replanting in lighter plastic containers for the move. This reduces weight and eliminates the risk of broken pottery.
Protecting Foliage: Wrap delicate leaves and branches in tissue paper or lightweight cloth. Avoid plastic bags, which can trap moisture and create fungal problems. For plants with long trailing vines, gently gather and secure them to prevent tangling or breaking.
Soil Management: Water plants lightly several days before moving so the soil is moist but not soggy. Wet soil is heavy and can leak, while bone-dry soil can shock plants when they’re finally watered again. Cover soil surfaces with plastic wrap to prevent spills in your vehicle.
Climate Control During Transport: Never leave plants in a parked car during hot or cold weather. Use sunshades to prevent overheating, and crack windows slightly for ventilation when safe to do so. On multi-day trips, bring plants into your hotel room rather than leaving them in the car overnight.
Packing Techniques for Different Plant Sizes
Not all plants are created equal, and your packing strategy shouldn’t be one-size-fits-all. A tiny succulent requires a different approach than a towering fiddle-leaf fig. The key is to give each plant individual attention based on its specific needs, size, and fragility. For smaller plants, you can often group several together in a single box, using cardboard dividers to keep them separate and upright. For your larger, more established green friends, you’ll need a more robust plan to protect their structure and foliage during the move. Thinking through these differences ahead of time will save you a lot of stress on moving day.
The Bare-Root Method for Saving Space
If your car is already packed to the brim, the bare-root method can be a real space-saver. This technique involves carefully removing a plant from its pot and gently shaking the excess soil from its roots. Once the roots are mostly clean, wrap them in damp paper towels or newspaper to keep them moist during the trip. You can then place several bare-rooted plants together in a box or even a suitcase. Just remember that they can’t stay like this for long. If you’re stopping at a hotel overnight, be sure to open the container to let your plants breathe and check that the roots remain damp.
Packing Large and Tall Plants
Your biggest plants present the biggest challenge. To make them more manageable, consider repotting them from heavy ceramic or terracotta pots into lightweight plastic containers a few weeks before the move. This simple switch makes them much easier to lift and reduces the risk of a beautiful pot breaking in transit. When boxing a tall plant, find a box that accommodates its height and secure the base of the pot so it can’t slide around. You can gently wrap the leaves and branches with old bedsheets or craft paper to protect them from snapping if the box gets jostled.
Labeling Boxes and Ensuring Ventilation
Once your plants are boxed up, clear labeling is your best friend. Use a thick marker to write “Live Plant” and “Fragile” in large letters on all sides of the box. It’s also crucial to draw arrows pointing up to indicate “This End Up.” This prevents a well-meaning helper from accidentally loading your plant sideways or upside down. Since your plants need to breathe, poke several air holes in the sides of the box to ensure proper ventilation. Fill any empty space inside the box with packing paper or newspaper to cushion the plant and prevent it from tipping over during the drive.
Moving Plants in Cold Weather
Moving during winter adds another layer of complexity. Plants are highly sensitive to sudden temperature drops, and a few minutes of exposure to freezing air can be fatal. Never transport plants in an open truck bed, a car trunk, or an unheated moving van where temperatures can plummet. Always keep them inside the heated cabin of your car. For extra protection on very cold days, you can wrap the pots in blankets or use commercial heat packs, but be aware that these have limitations in extreme cold. The goal is to maintain a stable environment and protect them from the shock of drastic temperature changes.
Can’t Take Them With You? What to Do With Your Plants
If transporting all your plants isn’t feasible, consider these alternatives that can help preserve your plant collection or reduce the number you need to move.
Propagation Projects: Many plants can be propagated through cuttings, creating new plants that are easier to transport than mature specimens. Start propagation projects months before your move. Small cuttings in water or small pots take up minimal space and often travel better than large, established plants. This approach works particularly well for pothos, philodendrons, succulents, and many herbs.
Seed Collection: For annual flowers and vegetables, collect seeds before your move. Seeds are lightweight, compact, and face no transportation restrictions. Package them properly with labels, and you can recreate your garden in your new location. This approach works especially well for heirloom varieties that might be difficult to replace.
Plant Rehoming: Consider finding good homes for some of your plants with friends, family, or local plant enthusiasts. Many plant lovers are happy to adopt well-cared-for plants, and you might be able to get cuttings or divisions back once you’re settled in your new home. Social media plant groups and local gardening clubs can help connect you with potential adopters.
Selling or Gifting Your Plants
If you’ve realized that transporting your entire plant collection just isn’t practical, finding new homes for some of them is a wonderful solution. This not only lightens your load but also ensures your green friends continue to be cherished. Start by offering them to friends, family, and neighbors who have admired your collection. For a wider reach, local gardening clubs and social media plant groups are fantastic resources for connecting with fellow enthusiasts who would be thrilled to adopt a well-cared-for plant. You can choose to sell them to recoup some moving costs or gift them to spread the joy. Plus, you can always ask the new owner for a cutting down the road once you’re settled. Sharing your plants reduces the stress of your move and fosters a sense of community with other plant lovers.
Is Shipping Your Plants a Good Idea?
While some specialized plant retailers ship plants successfully, this isn’t typically a viable option for personal plant collections. Standard shipping services like UPS, FedEx, and USPS have restrictions on live plants, and the conditions during transport are often harsh.
If you decide to attempt shipping, research companies that specialize in live plant transport. These services are expensive and still carry significant risk. Plants must be carefully packaged with temperature control measures, and even then, success isn’t guaranteed. Priority overnight shipping reduces transit time but increases costs substantially.
Never attempt to ship plants through regular mail services without declaring them properly. This violates postal regulations and agricultural laws, potentially resulting in fines and confiscation of your plants.
Choosing a Shipping Carrier
If you’re set on shipping your plants, you’ll need to do some serious homework. Standard carriers like FedEx or UPS generally aren’t equipped to handle live plants, as their transport conditions can be harsh with extreme temperature shifts and rough handling. The United States Postal Service (USPS) has specific guidelines you must follow, and not all plants are eligible for mailing. Before you even consider boxing up a plant, you must check the carrier’s regulations to see what’s allowed and what’s prohibited. This is especially important for shipping across state lines, where agricultural laws add another layer of complexity.
You might find companies that specialize in transporting live plants, but these services come at a premium price and don’t eliminate the risk. Even with expert packaging and climate control measures, the stress of transit can be too much for a plant to survive. Opting for priority or overnight shipping reduces the time your plant spends in a box, but this will significantly increase your costs. Remember, it is your responsibility to declare any plants you ship. Attempting to mail them without proper declaration violates postal regulations and can lead to fines or the confiscation of your beloved greenery.
Which Plants to Move (and Which to Leave Behind)
When space and logistics limit how many plants you can transport, prioritize based on several factors. Rare or irreplaceable plants should top your list, especially if they have sentimental value or would be difficult to replace. Consider the cost of replacement – expensive plants warrant more effort than those easily found at local garden centers.
Evaluate each plant’s likelihood of surviving the journey. Hardy plants like snake plants, pothos, and most succulents travel better than delicate species like ferns or tropical flowering plants. Young, healthy plants typically handle stress better than old or already-struggling specimens.
Consider the climate in your new location. Plants that won’t thrive in your destination’s environment might not be worth the effort to transport. Research your new area’s hardiness zone and growing conditions to make informed decisions about which plants will succeed in their new home.
Helping Your Plants Settle Into Their New Home
Once you arrive at your destination, your plants will need time to recover from the journey. Don’t immediately place them in their permanent locations – they need gradual acclimatization to their new environment.
Start by placing plants in a sheltered location with indirect light. Avoid immediate repotting unless absolutely necessary, as this adds additional stress. Water carefully, as plants may need different amounts than usual while recovering from transport stress.
Monitor plants closely for signs of stress like drooping, yellowing leaves, or leaf drop. Some stress response is normal after a major move, but watch for signs of serious problems that might require intervention. Gradually introduce plants to their permanent locations over several weeks rather than making abrupt changes.
Understanding and Managing Transplant Shock
Even with the most careful planning, your plants will likely experience some degree of transplant shock. This is the stress a plant endures when it’s moved to a new environment, and it’s completely normal. Symptoms can include wilting, yellowing leaves, or even dropping a few leaves altogether. Think of it as plant jet lag. The sudden changes in temperature, light, and humidity during the move are a lot for a living organism to handle. The key is not to panic. Your plant isn’t necessarily dying; it’s just adjusting. Patience and gentle care are the best remedies to help it recover and adapt to its new surroundings.
A Post-Move Care Routine
Your first instinct might be to place your plants in their perfect, sunny new spots, but hold off. They need a gradual transition to feel at home. Start by creating a “recovery room” in a sheltered location with bright, indirect light, like a spare room or a covered patio. This gives them a stable environment to recuperate without the stress of direct sun or drafts. Check the soil moisture, but be careful not to overwater, as stressed plants are more susceptible to root rot. Hold off on fertilizing for at least a month. Adding fertilizer now is like asking someone to run a marathon right after a long flight—it’s just too much stress. Let your plants rest and acclimate first.
When to Repot Your Plants
Repotting adds another layer of stress, so it’s best to avoid it immediately after you arrive. If you transported your plants in their original pots, leave them be for a few weeks. If you moved them into temporary plastic pots to save weight, you can plan to move them back into their permanent homes within one to two weeks. This brief waiting period gives them just enough time to stabilize from the initial shock of the journey. When you do repot, be gentle with the root ball and use fresh potting soil. Just like everything else in this post-move phase, this is another step in the gradual process of helping your plants settle in, a task you can tackle while you work through the rest of your moving checklist.
A Fresh Start: Building Your New Plant Family
Moving long distance provides an opportunity to start fresh with plants better suited to your new environment and lifestyle. Research native plants in your new area, which will be better adapted to local conditions and require less maintenance.
Visit local nurseries and garden centers to discover what grows well in your new region. Many areas have unique native species that might become new favorites. Connect with local gardening groups and plant societies to learn about the best varieties for your specific location.
Consider this move a chance to refine your plant collection. Focus on species that bring you the most joy and success rather than trying to replicate exactly what you had before. Sometimes a smaller, more focused collection brings greater satisfaction than attempting to maintain everything you previously owned.
While professional movers won’t transport your plants long distance, understanding the reasons behind this policy helps you plan effective alternatives. With careful preparation, strategic decision-making, and personal transport, you can successfully move at least some of your plant collection to your new home. The key is accepting that moving plants long distance requires personal involvement and that not every plant may make the journey – but with proper planning, your most treasured green companions can thrive in their new environment.
Frequently Asked Questions
I only have a few small houseplants. Can’t the movers just tuck them into the truck? I know it seems simple, but unfortunately, it’s a hard no for any reputable mover. It’s not about the space they take up; it’s about agricultural laws that prevent spreading pests across state lines and the fact that moving trucks are not climate-controlled. Your plants could easily freeze or bake, and the moving company’s insurance won’t cover them. It’s a liability and regulatory issue they simply can’t bypass, even for a tiny succulent.
What’s the most common mistake people make when moving their plants? The biggest mistake is waiting until the last minute. Plants are living things that get stressed by sudden changes. If you wait until moving day to prune, repot, or pack them, you’re compounding the shock of the journey itself. The best thing you can do is start preparing them three to four weeks in advance. This gives them time to recover from each step before they hit the road.
My plant looks awful after we arrived. Did I kill it? Don’t panic! It’s very likely just transplant shock, which is like jet lag for plants. Wilting, yellowing, and even dropping a few leaves are normal stress responses to a new environment. Give it time to adjust. Place it in a spot with indirect light, be careful not to overwater, and hold off on fertilizer for at least a month. A little patience is usually all it needs to bounce back.
I have to move in the middle of a hot summer. Is it hopeless for my plants? It’s definitely more challenging, but not hopeless. The absolute rule is to never leave them in a parked car, which can become an oven in minutes. Plan your drive to minimize the time they spend in the vehicle during the hottest part of the day. Use sunshades on your car windows, and most importantly, bring your plants into your air-conditioned hotel room with you every single night.
I can’t take all my plants with me. How do I decide which ones to leave behind? This is a tough one, but think practically. Prioritize plants that have sentimental value or are rare and expensive to replace. Then, consider which ones are most likely to survive the trip—hardy plants like snake plants and pothos are better travelers than delicate ferns. Finally, check if the plant is even suited for your new climate using the USDA Plant Hardiness Zone Map. It’s better to re-home a plant that won’t thrive than to watch it struggle in its new environment.
Key Takeaways
- Understand Why Movers Say No to Plants: It’s not personal—it’s practical. Strict agricultural laws prevent the spread of pests across state lines, and moving trucks aren’t equipped to keep plants alive. This means you’ll need to be your plant’s personal chauffeur.
- Your Car is Your Plant’s Best Bet for a Safe Trip: The key to a successful plant move is planning ahead. A few weeks out, start by pruning them and repotting into lighter plastic pots. Transporting them in your own vehicle gives you control over temperature and handling, ensuring they arrive in good shape.
- Help Your Plants Adjust to Their New Home: Expect some “transplant shock” like wilting or yellowing leaves—it’s normal after a move. Give them time to recover by placing them in a spot with indirect light and waiting at least a few weeks before you repot or fertilize.
Related Articles
- Moving Plants Long Distance: Why Movers Say No (And What to Do Instead)
- Moving Plants Long Distance: Why Movers Say No (And What to Do Instead)

Starving Movers